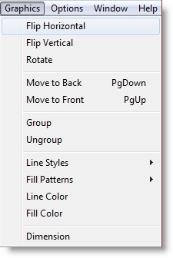
The Graphics menu is for manipulating one or more objects that comprise a library graphic. With this menu, you can group several objects together, flip and rotate objects, and alter the color, fill pattern and line style of objects. You can also adjust the dimensions of the entire graphic.
Flip Horizontal Horizontally flips the entire graphic or any selected objects of the current graphic. This menu item works like the button of the same name described later in this chapter.
Flip Vertical Vertically flips the entire graphic or any selected objects of the current graphic. This menu item works like the button of the same name described later in this chapter.
Rotate Rotates the entire graphic or any selected objects of the current graphic 90 degrees clockwise. This menu item works like the button of the same name described later in this chapter.
Move to Front Moves the selected object in front of all other objects. Use this option to see an object obscured by other objects. This menu item works like the button of the same name described later in this chapter (to move an object one position forward at a time, use the Graphic Tools).
Move to Back Moves the selected object behind all other objects. Use this option to send an object obscuring other objects to the background. This menu item works like the button of the same name described later in this chapter.
Group Combines or groups several objects into a single object for sizing and editing.
Ungroup Ungroups several grouped objects so they may be edited individually.
Line Styles Allows the user to choose the line style including solid, dashed, line thickness, and optional arrowheads on either end of the line.
Fill Patterns Allows the user to choose the fill pattern for solid objects including transparent, slant, backward slant, grid, crosshatch, vertical, horizontal, solid, vertical gradient, and horizontal gradient.
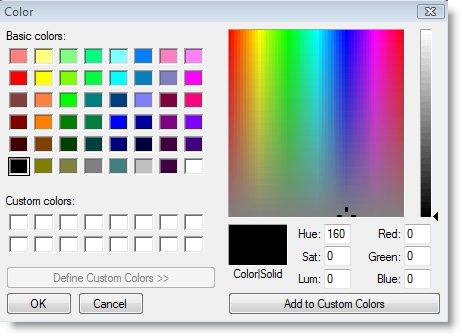
Line Color Allows the user to choose the line color and create custom colors.
Fill Color Allows the user to choose the fill color and create custom colors for solid objects.
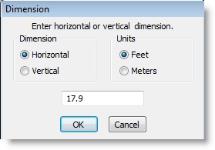
Dimension Brings up the Dimensions dialog box for defining the graphic dimension. The dimension can be height or width. The units can be feet or meters.
Please Note: Line Styles, Fill Patterns, Line Color, and Fill Color set the feature and cause the setting to be applied to the currently selected elements.
When using the graphic tools to create an icon, it is often helpful to group several graphics into a single graphic for editing purposes. For example, you may create an icon using the square, line, and circle tool and want to work with them as a single item.
How to group objects together:
The Ungroup option allows you to ungroup several grouped objects.
How to ungroup previously grouped objects:
You may choose different styles for the lines and borders of objects by choosing Line Styles in the Graphic Editor Graphics menu.
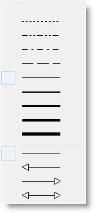
How to change the line style or border style of an object:
Please Note: The arrowhead color is the same as the line color and is defined through the Line Color in the Graphics menu.
Various patterns may be used to fill each object by choosing Fill Patterns from the Graphic Editor Graphics menu.
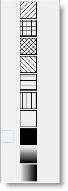
How to change the fill pattern of an object:
You may also select a custom color for your lines and graphics.
How to change line or fill color
You can define the height or width of an object in feet or meters from the Dimensions Dialog box. This will determine how large the graphic appears when placed on a model layout. For example, to change the width of a graphic loaded in the Edit window to 5.00 feet, enter the following in the Dimensions dialog box:
How to change the graphic’s dimensions:
For example, a graphic of a computer is displayed in the Graphic Edit window. The size of the graphic in the Graphic Edit window is 1.40 x 1.00 as shown below.

However, the computer is really 2 feet wide. To change the graphic’s dimensions, select Dimension from the Options menu. Type 2 for the horizontal dimension and click OK.

Notice the vertical dimension is automatically adjusted to 1.43. You can only define either the horizontal or vertical dimension of the graphic. If you define one dimension, the software will automatically calculate the other according to the proportions of the graphic in the Edit window. If you know the graphic is actually 2.00 x 1.50 feet, you will need to adjust the proportions of the graphic accordingly by using various tools from the Tools button bar.

|
© 2012 ProModel Corporation • 556 East Technology Avenue • Orem, UT 84097 • Support: 888-776-6633 • www.promodel.com |