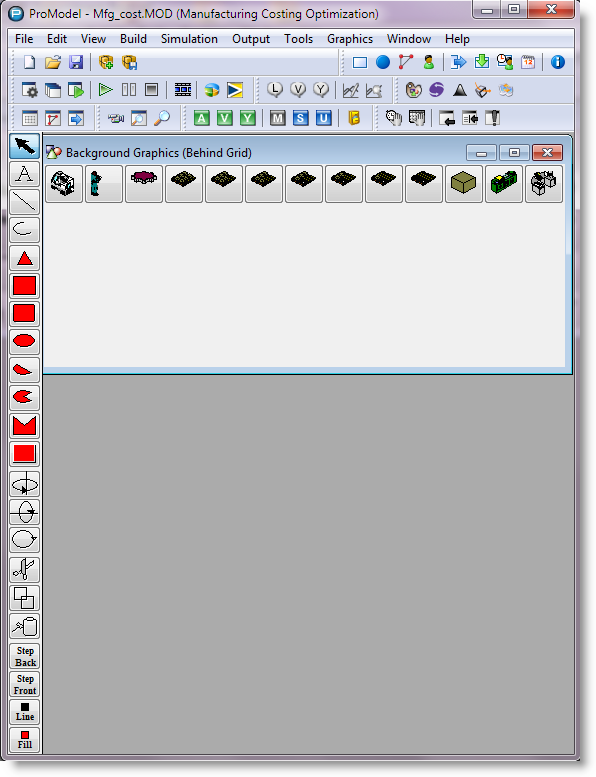
The Background Graphics Editor allows you to place icons, text and other graphic shapes on the layout behind locations and other system element graphics. The arrangement of the two windows and button bar is shown below.
The Library Graphics window contains the icons of the current graphic library file, specified in the General Information dialog. These icons may be placed on the Layout in the same way as other objects.
You may size the window as desired, or use the scroll bar shown above to scroll through the available icons.
The Tools button bar contains the tools necessary to create objects various shapes. It also contains tools for editing those objects including flip, rotate, and cut.
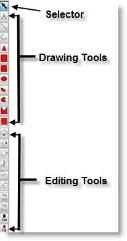
The Background Graphics Editor Tools button bar is the nearly the same Tools button bar used in the Graphic Editor. The only difference is that the Background Graphics Editor Tools button bar does not contain an entity spot or status light tool. For more information on the Tools button bar, see Graphic Tools Button Bar.
Use the Edit menu for selecting and duplicating the graphic objects in the current Background Graphics mode. You may also use it to exchange graphics with other applications. To use the Edit menu functions, select the object you wish to edit by clicking on it in the Layout window.
The first four functions apply to the currently selected object. To select multiple objects, hold the shift key while selecting an object. Alternatively you can drag a rectangle encompassing the objects you want selected. To deselect one of several selected objects, click on the selected object while holding the shift key.
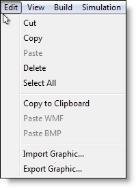
Cut Removes the selected object(s) and makes a temporary copy that may be pasted back into the edit window later.
Copy Makes a temporary copy of the selected object(s) for later pasting.
Paste Adds the most recently cut or copied object(s) to the Layout window.
Delete Deletes the selected background graphic from the Layout window.
Select All Selects all of the graphic objects in the current mode.
Copy to Clipboard Copies all graphic objects in the current mode to the clipboard as a bitmap or windows metafile so they can be pasted into another application such as a word processor.
Paste WMF Pastes a Windows metafile (WMF) from the Windows clipboard into the Layout window. You must have previously copied a Windows metafile to the Windows clipboard.
Paste BMP Pastes a bitmap file (BMP) from the Windows clipboard into the Layout window. You must have previously copied a bitmap file to the Windows clipboard.
Import Graphic Imports a WMF, EMF, BMP, PCX, or GIF file into the Layout window.
Export Graphic Exports all graphic objects in the current mode to a WMF or BMP file.
Importing a background graphic can bring reality into the model. For example, if a layout is created in a graphics program, it may be desirable to import the entire layout rather than create it in
How to import a background graphic into the layout:
How to move an imported background graphic:
How to size an imported background graphic:
Please Note: Once imported, the background graphic is not a separate file from the model. It is included in the model. Therefore, when moving or copying a model file from one directory to another, it is not necessary to move or copy the imported background graphic file as well. On the other hand, if the external graphic file is changed, it must be re-imported to update the model layout.
In some cases, it is desirable to export a graphic created in
How to export a graphic:
The Graphics Menu allows you to flip and rotate the selected graphic object(s) in the layout window. It also allows you to specify whether you want the graphic to be behind or in front of the grid. Additionally, it allows you to group selected graphic objects together into a single graphic. Finally, it provides the option to define line styles, fill patterns, line color, and fill color.
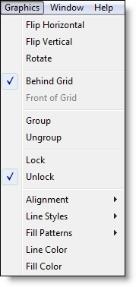
Flip Horizontal Horizontally flips the selected object(s).
Flip Vertical Vertically flips the selected object(s).
Rotate Rotates the selected object(s) 90 degrees clockwise. This does not apply for non-true-type fonts.
Behind Grid Moves the selected object in the layout window behind the grid. Once this is done, you must go to Behind Grid mode to edit the graphic.
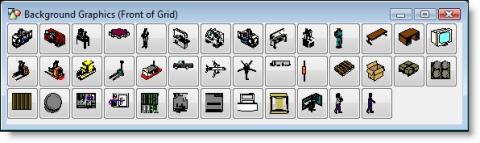
Front of Grid Moves the selected object in the layout window in front of the grid. Once this is done, you must go to Front of Grid mode to edit the graphic.
Group Combines or groups several graphic objects into a single graphic so they may be sized and edited together.
Ungroup Ungroups several grouped graphic objects so they may be edited individually.
Lock Locks a graphic in place so that it can’t be moved. This is helpful for preventing accidental moving of a graphic that you wish to leave stationary.
Unlock Unlocks a locked graphic, allowing it to be moved on the layout.
Alignment When multiple objects are selected on the layout, they can be aligned side to side, top to top, etc.
Line Styles Allows the user to define the line style including transparent, dashed, line thickness, and optional arrowheads on either end of the line. If any objects are selected, the line styles of the selected objects are changed.
Fill Patterns Allows the user to define the fill pattern for solid objects including slant, grid, crosshatch, backward slant, horizontal, vertical, transparent, solid, vertical gradient, and horizontal gradient. If any objects are selected, the fill patterns of the selected objects are changed.
Line Color Allows the user to define the line color and create custom colors. If any objects are selected, the line color of the selected objects are changed.
Fill Color Allows the user to define the fill color and create custom colors for solid objects. If any objects are selected, the fill color of the selected objects are changed.
Please Note: All functions in the Graphic menu of Background Graphics are nearly the same functions described in the Graphic Editor Graphic menu. Differences are noted below for moving a graphic behind the grid and in front of the grid. See Graphic Editor for more information on the functions above.
How to move a graphic behind the grid:
How to move a graphic in front of the grid:

|
© 2012 ProModel Corporation • 556 East Technology Avenue • Orem, UT 84097 • Support: 888-776-6633 • www.promodel.com |