
When you import data from a Microsoft Excel® spreadsheet into an array, Process Simulator loads the data from left to right (i.e., within a row), and then from top to bottom (i.e., within a column). The limit to the number of rows and columns your arrays have depends upon the version of Excel you are using, the type of array defined (integer, real, expression), and the memory limits of your computer and operating system.
Steps to import Excel spreadsheet data into an array:
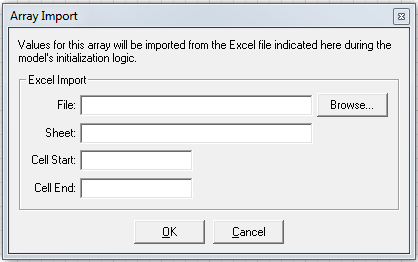
Below are descriptions of the fields in the dialog box.
File — the name of the Excel file from which you want to import data. You may type either a fully qualified path to your Excel file or a path relative to your Visio® file. For example, if your Excel file is in the same directory as your Visio file, simply enter the name of the Excel file into this field.
Sheet — the name of the worksheet in the Excel file from which you will import the array data.
Note: If your spreadsheet contains only a single data set, Process Simulator will automatically load the data into the array. You do not have to define any cell information unless you want to limit the contents of the array to a portion (i.e., a subset) of the import data set. Importing data into an array requires Microsoft Excel 97 or later.
Cell Start — the cell in the spreadsheet with the first piece of data to import into the array.
Cell End — the cell in the spreadsheet with the last piece of data to import into the array. Note: the column letter and/or the row number for this cell must be greater than that provided in the Cell Start box.
© 2014 ProModel Corporation • 556 East Technology Avenue • Orem, UT 84097 • Support: 888-776-6633 • www.promodel.com